Character Control
The Top-down movement behavior allows you to control the player using the arrow keys on the keyboard, so go ahead and test that in Preview.
So, the character can move around, but it doesn't look very lively. We will need to add some animation to the player, but before we do that, let's consider the low-coding paradign in GDevelop - Events.
In GDevelop, events define the logic of a game. If you have experience with Scratch, you would have used events before.
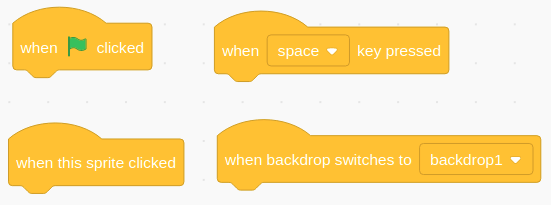
Events in Scratch
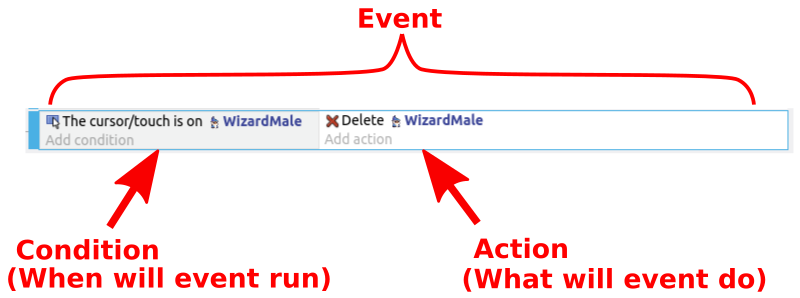
Each event in GDevelop, consists of conditions and actions. Conditions define when the event will trigger and also select which object are affected by the action, while the actions define what happens when the event triggers.

Events with no conditions will run every frame

First Event
Switch to the events tab...
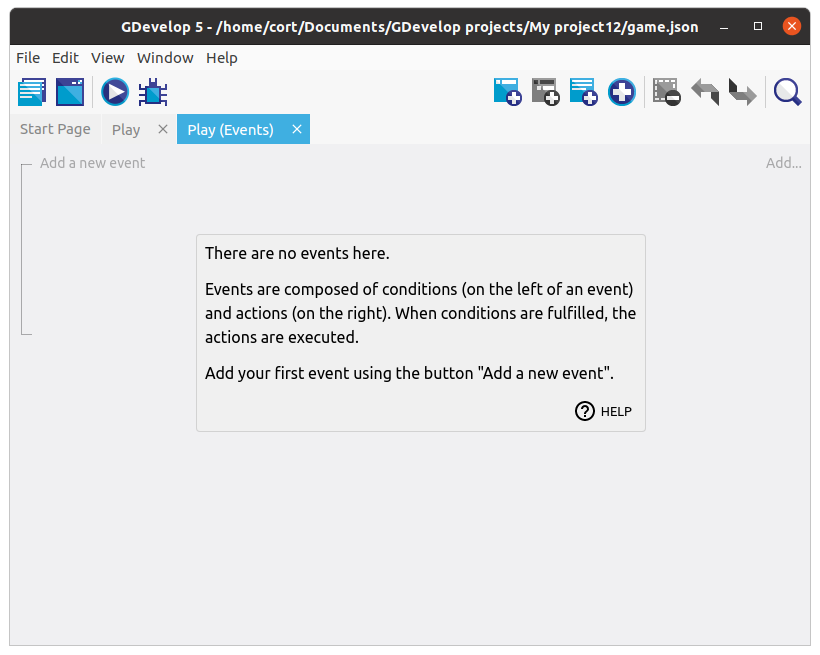
Then click on the Add new empty event button. You should now have a new event with empty conditions and actions.
![]()
Let's use events to control the animation of our character!
(Optional) Touchscreen Control Buttons
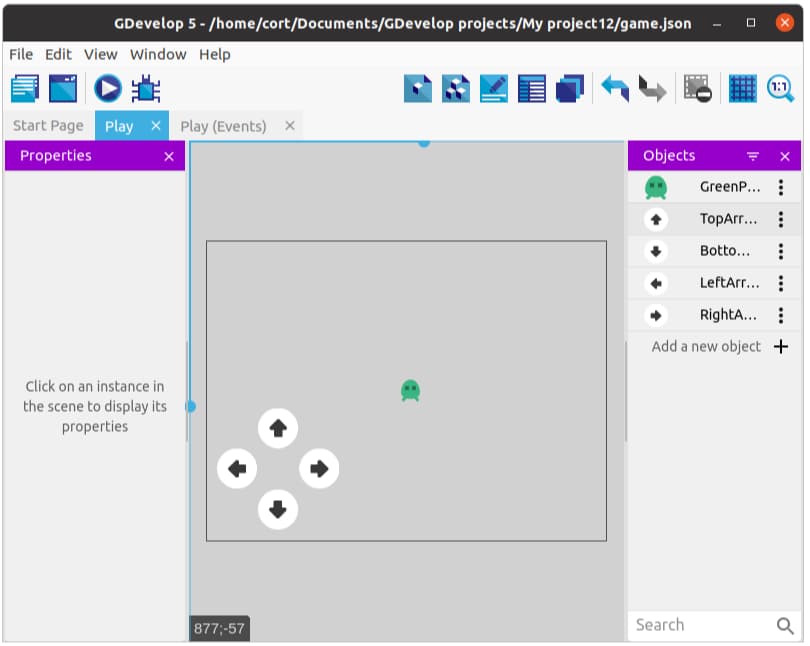
Add a new object and select an up arrow. You can use whichever one you prefer.
![]()
Continue adding arrows until you have one in each direction.

Drag one instance of each arrow into the scene, and for each arrow...
- Change the size to something appropriate (...if required).
- Position it like in the following image.
Add events to simulate default control:
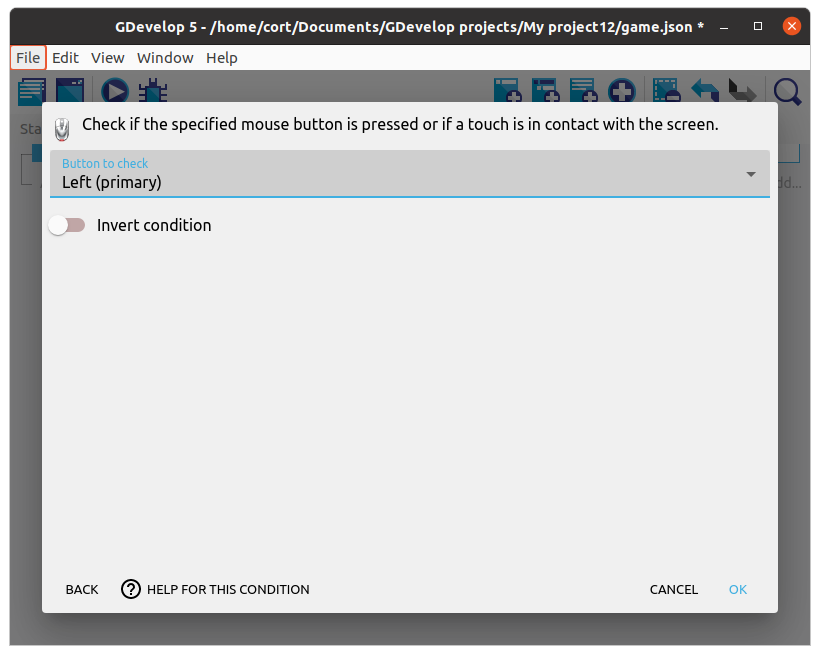
Click on Add condition, click Other conditions, and select the Mouse button pressed or touch held condition.
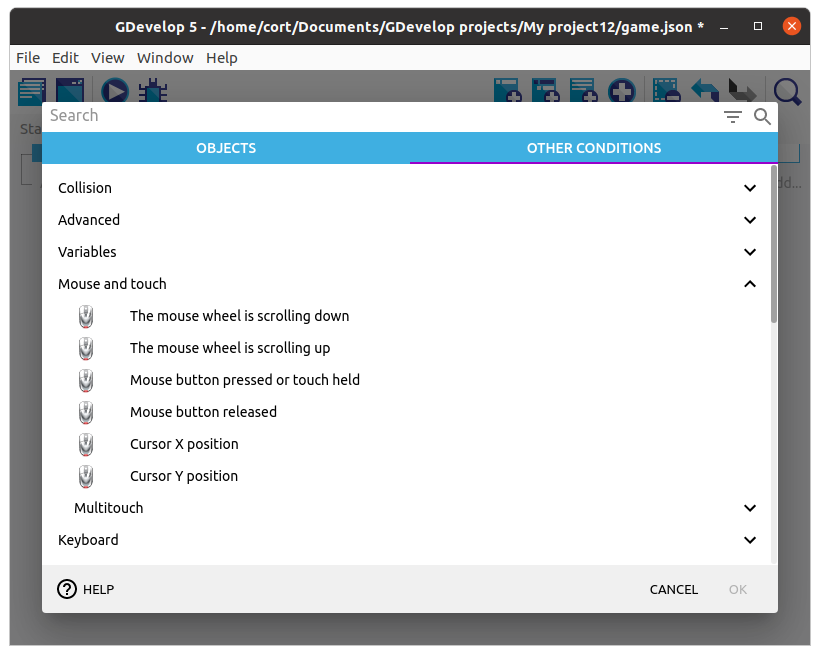
Under Button to check select the Left (primary) button, then click Ok.
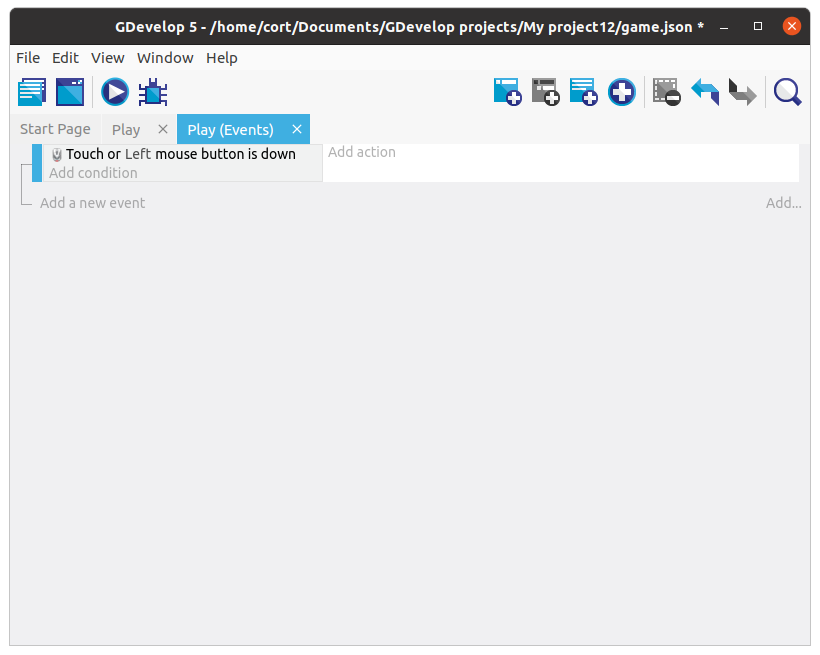
Your events tab should now look like this...
Sub Events
That first event will detect when you touch the screen, but it can't tell which button was touched. To do that, we'll add a sub-event under it to detect the buttons. Sub-events are only considered when their parent event are true.
Select the first created event, and click the Add sub-event to the selected event button.
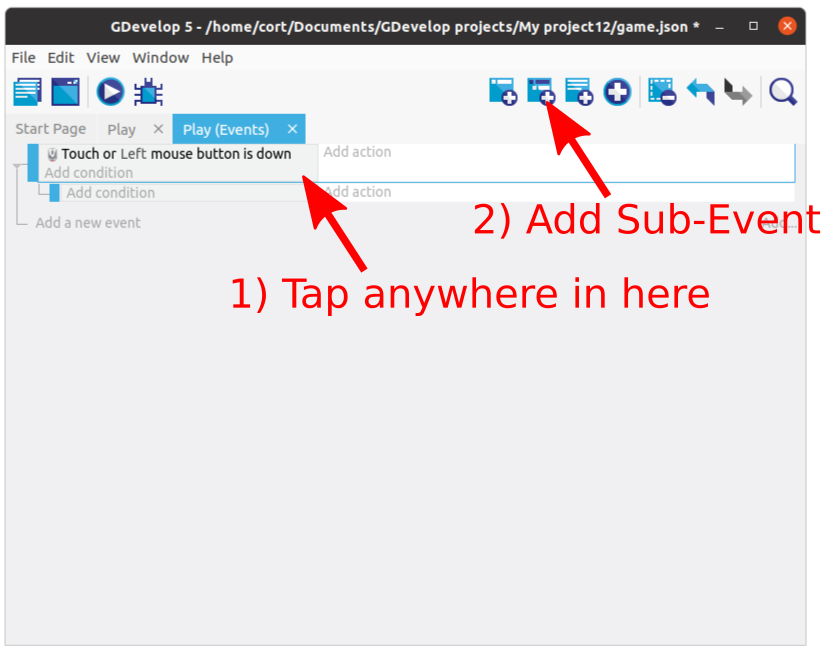
Make sure that the subevent is under the mouse button event. If it is not, just drag it into place.
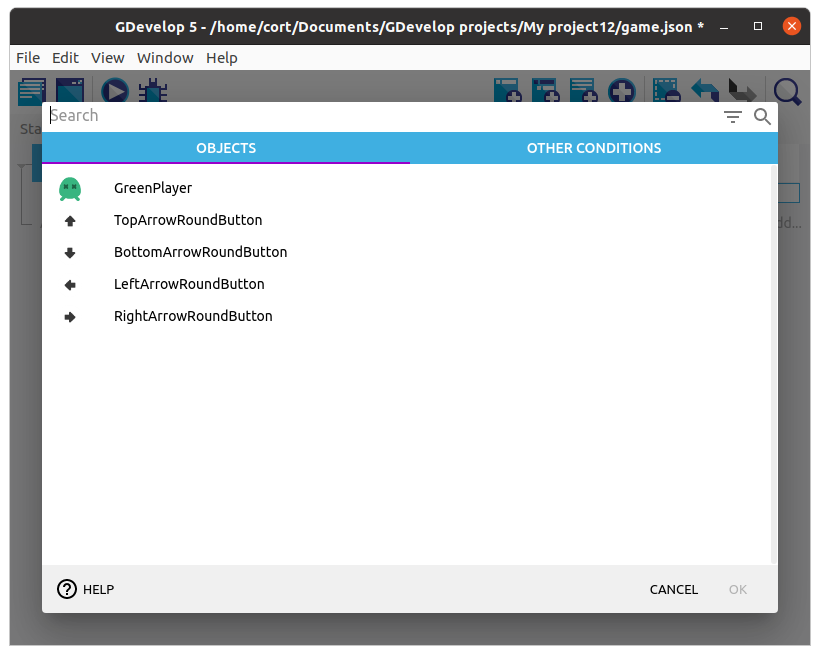
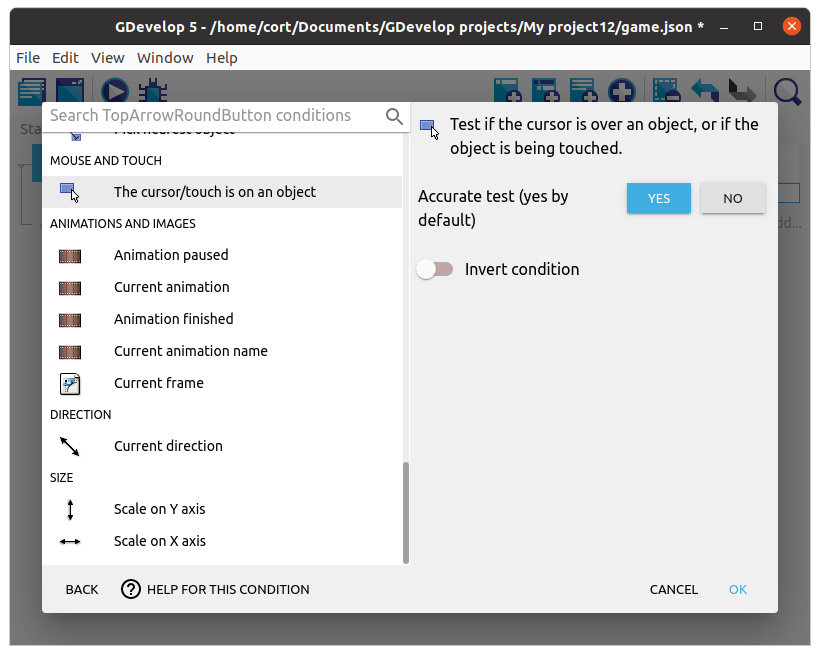
Next, click on the condition for the sub-event, select the Up arrow, then select cursor/touch is on an object condition. Click Ok.
Action
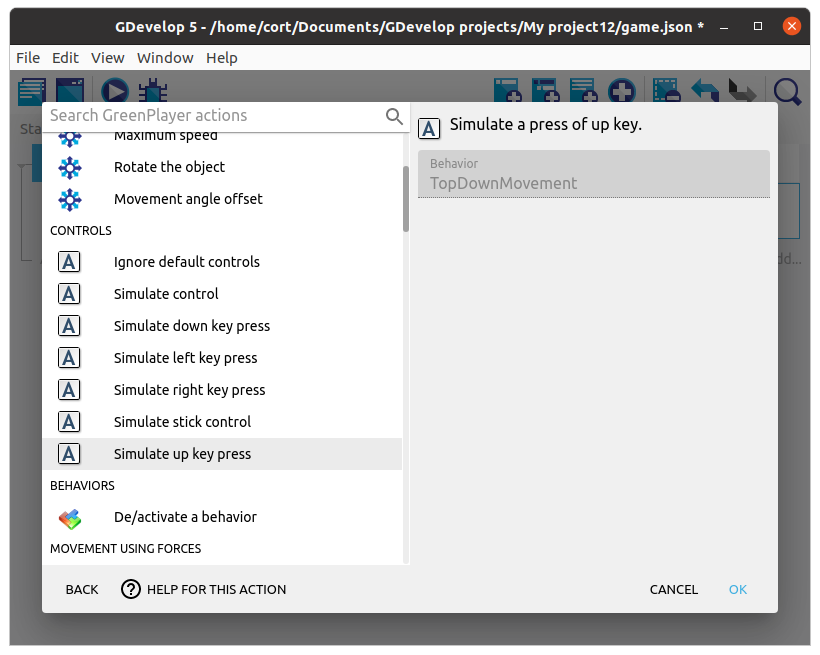
Now we'll add an action for the sub-event. When the Up arrow is pressed, we want it to simulate an up keypress.
Under the sub-event, click Add action, select the player, then select the Simulate up key press action. Click Ok.
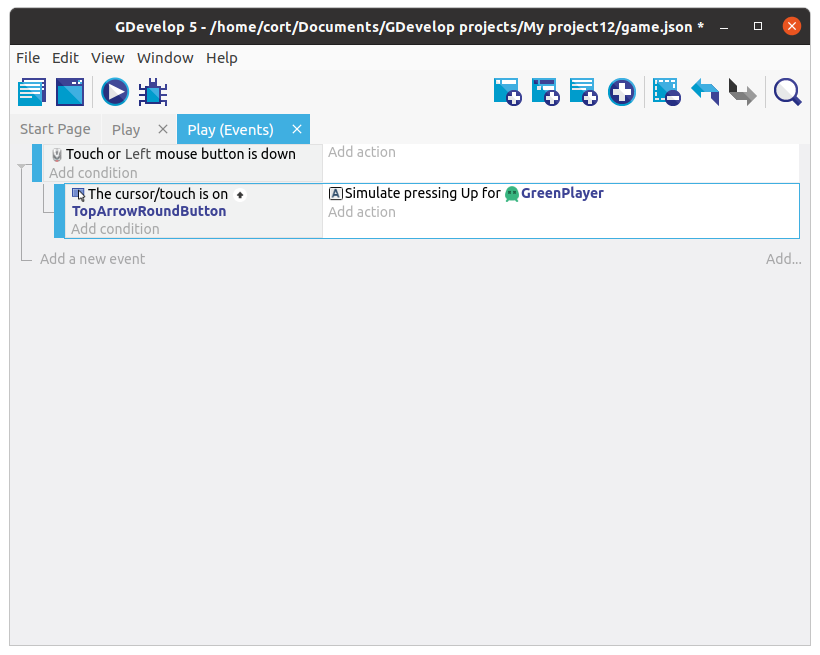
Your events tab should now look like this...
Add the rest
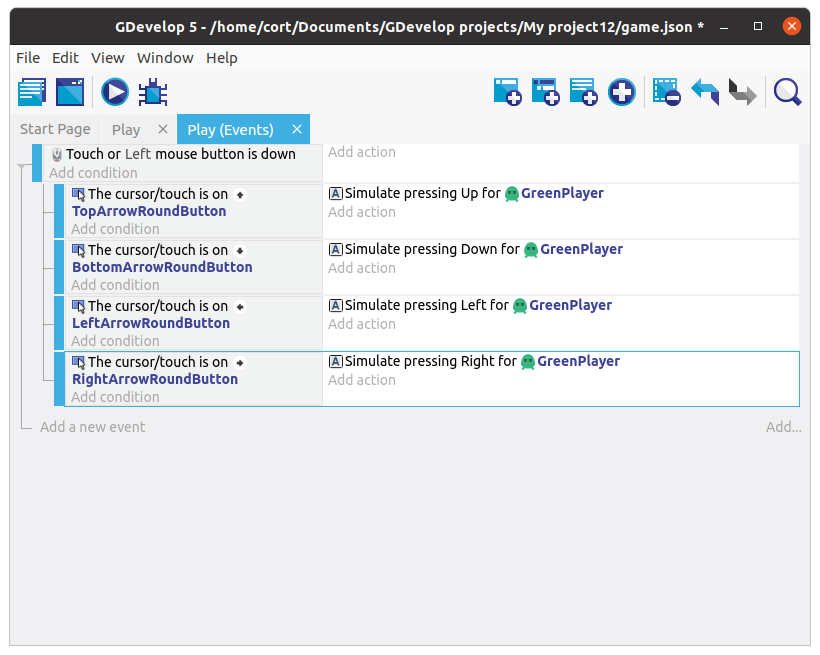
Repeat the steps, adding a sub-event for each direction. When you're done, your events tab should look like this...
Preview the Scene
At this point, you can preview the scene by clicking the Preview button.
Test the controls and make sure that your player character is moving correctly.